Kaltura – Kaltura Capture Desktop Recorder
Use Kaltura Capture to easily record yourself and/or your screens to create recordings that can seamlessly upload to your personal media repository in Canvas. Recordings that feature multiple sources (webcam and screen, for instance) will be visible in Canvas through Kaltura’s interactive rich media player allowing students to choose how they wish view the recording: Picture-in-picture, side-by-side, or only focus on one source.
To get started, be sure you meet the minimum system requirements and proceed to access My Media:
Installation instructions for first use:
- Log in to canvas.unm.edu.
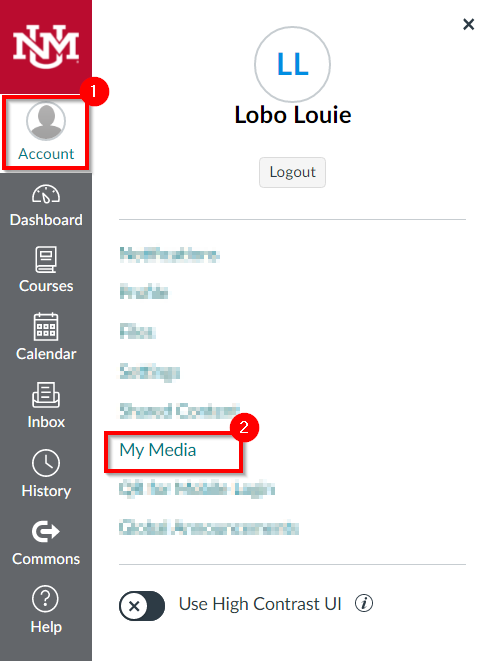
- In the Global Navigation, Click Account > My Media.

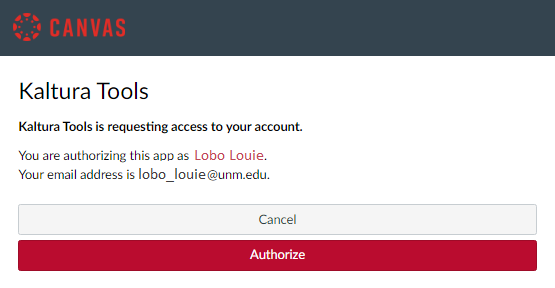
Note: If you are accessing Kaltura for the first time inside of Canvas, you may be asked to Authorize the Kaltura Tools in your account.

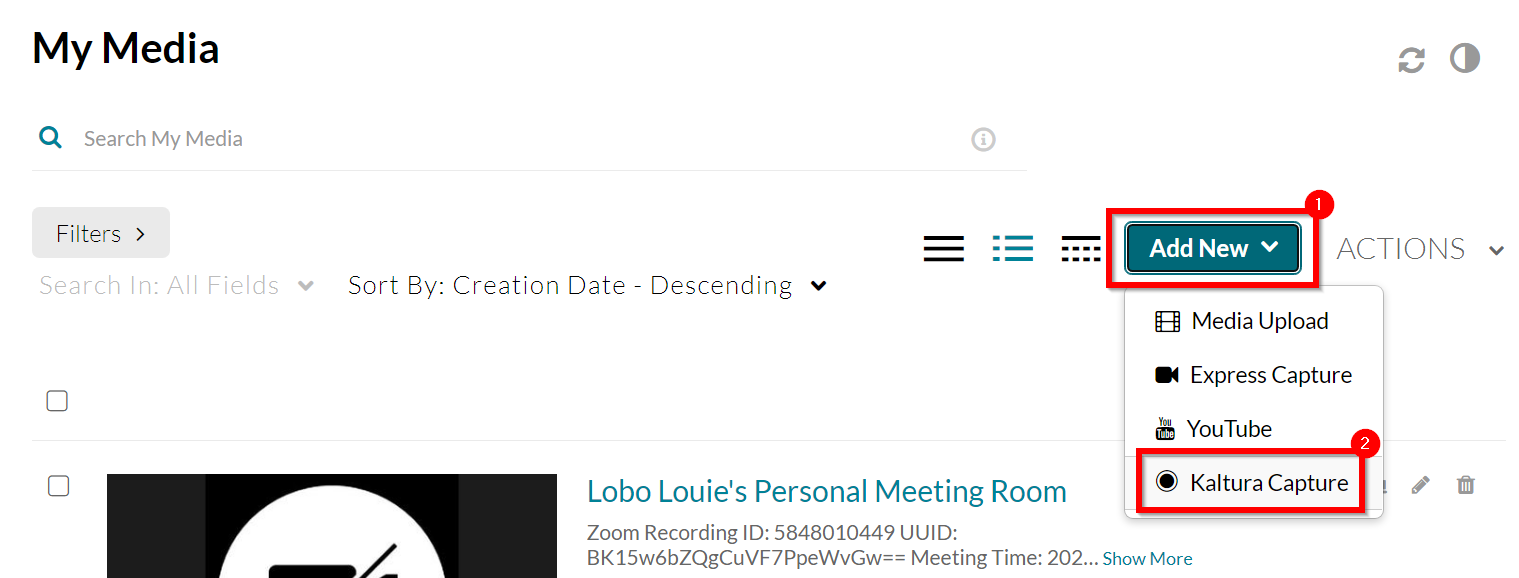
- Your My Media repository will load.
- Click Add New > Kaltura Capture.

- Select the appropriate download for your computer.

- Click Run to activate the installation file and install Kaltura Capture.
- Once the installation finishes, return to your browser and click the back button to return to My Media.
- Once again, click Add New > Kaltura Capture.

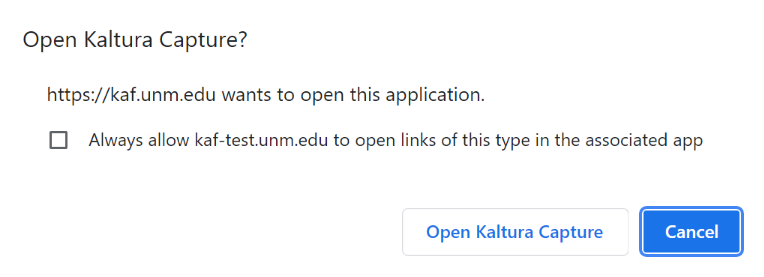
- Your browser should prompt you to open Kaltura Capture.
Note: You may want to select “Always allow kaf.unm.edu to open links of this type in the associated app” to avoid being prompted each time you launch Kaltura Capture.

Important Note for MacOS users: Certain versions of MacOS may block the Kaltura Capture application from accessing screen recording and your microphone. See https://knowledge.kaltura.com/help/how-to-enable-security-setting-on-mac-osx for details on addressing this.
Creating a Kaltura Capture recording:
After installing Kaltura Capture, you can choose to launch the application through My Media > Add New > Kaltura Capture or by finding the application locally on your computer.
With Kaltura Capture you can mix and match combinations of cameras, screens and microphone. Use the icons to toggle which of these sources you want to include in your recording, and the dropdown menus to select different devices. If the source is blue and not grayed out, it will be included in your recording.

For more in-depth instructions on recording features, see https://knowledge.kaltura.com/help/kaltura-capture-recording-options.
Once you have finished recording and are ready to upload it, see https://knowledge.kaltura.com/help/kaltura-capture---completing-and-uploading-your-recording.
System Requirements
Download Speed (Mbps) | Delivery | Resolution (Quality) |
0.3 | Small | 640x360 |
1 | Medium | 960x540 |
1.5 | HD | 1280x720 |
2+ | FHD | 1920x1080 |
|
|
|
HW/SW | Requirement | |
Browser | Chrome 138+ | |
| Firefox 140+ | |
| Safari 17+ | |
| Edge 138+ | |
Mobile |
| |
iOS | Safari 17+ | |
Android 7.0 and above | Chrome 138+ | |
HW/SW | Requirement |
Operating System | Windows 10 - 11 (64 bit) |
| macOS 13 (Ventura) or higher |
Memory | 4GB RAM |
Storage | 1GB min available |
Processor |
|
Screen Resolution | 1024 X 768 (100% scale) or higher |
Internet Speed |
|
Download | NA |
Upload | > 1 Mbps |
