Kaltura – Express Capture Recorder
Use Express Capture to record short videos with your webcam and microphone directly from your browser without the need to install any software. This is a great alternative for devices that do not support Kaltura Capture or for those wanting to quickly record a short video of themselves.
Note: Not all browsers support capturing your webcam and microphone. For the best experience, it is recommended you use the latest version of Google Chrome.
To get started, access My Media for your account:
- Log in to canvas.unm.edu.
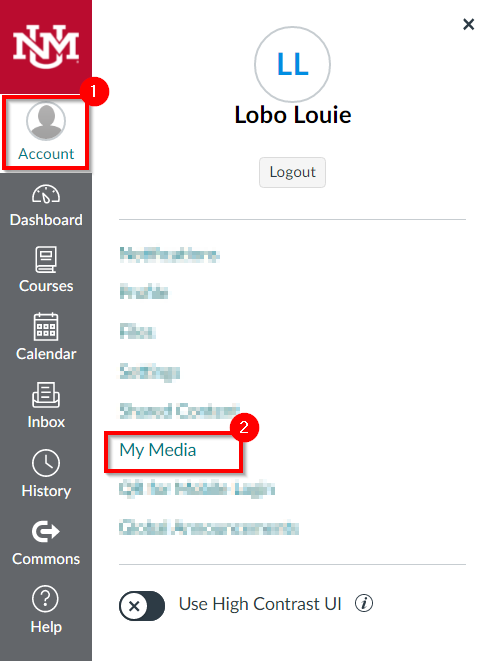
- In the Global Navigation, Click Account > My Media.

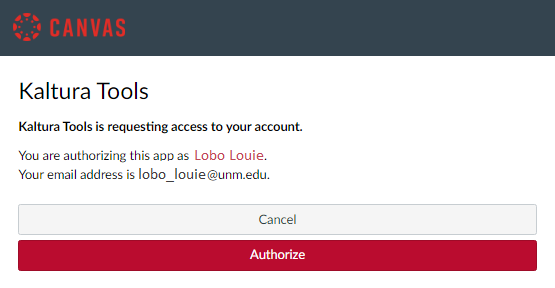
Note: If you are accessing Kaltura for the first time inside of Canvas, you may be asked to Authorize the Kaltura Tools in your account.

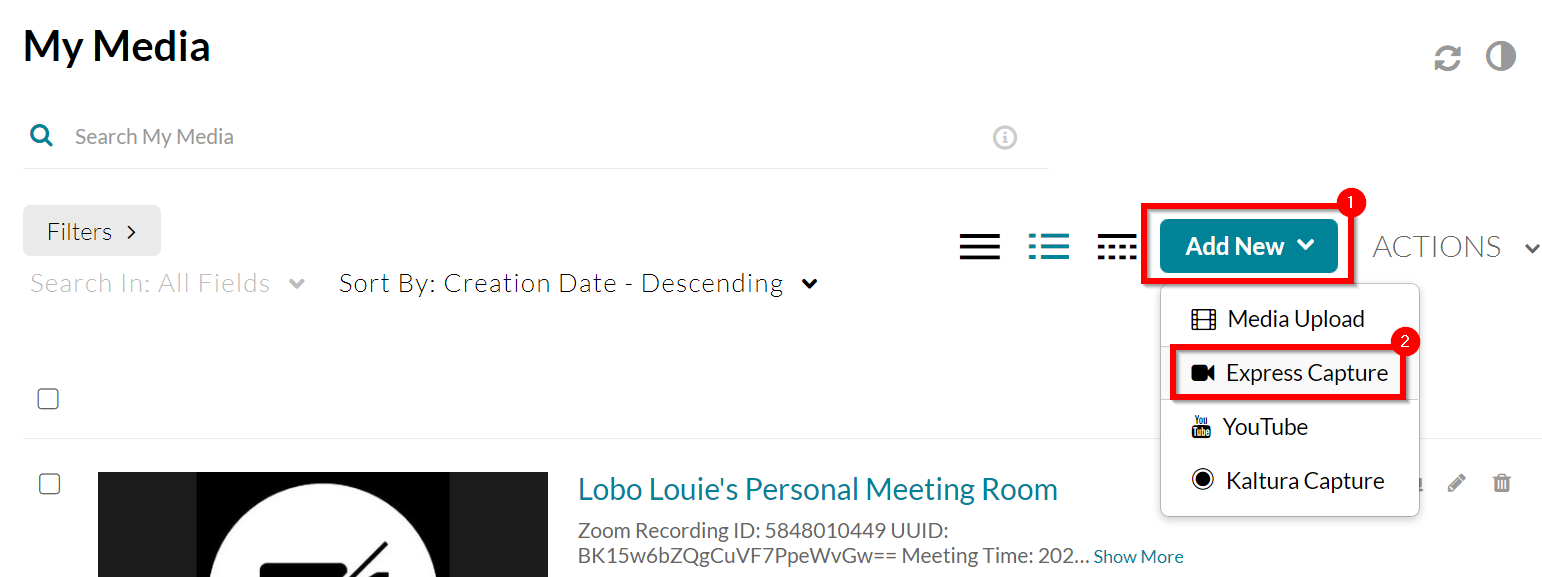
- Your My Media repository will load.
- Click Add New > Express Capture.

- If this is your first time launching this tool, be sure to allow your browser to access your webcam and microphone.
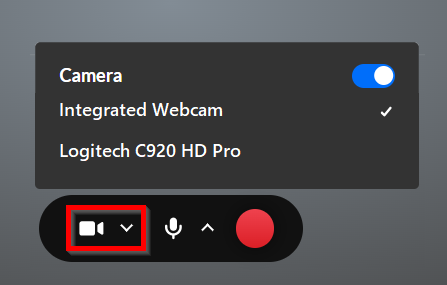
- Click the webcam or audio settings to select a different device (if you have multiple) and to toggle the camera/audio capture on/off.

Note: For an audio-only recording, click the menu for Camera, then move the slider left to turn it off. If successful, the icon will be dark gray with a slash through it.
- Click the record button to start your recording.
- When finished, click the stop button.
Your recording preview should start playing. If you need to re-record and/or select a different source, click Record Again and return to step 6 above.
- If you are happy with your recording, click Use This.

- The upload will begin to process.
- (Optional) Change the name, add a description, and tags to better organize your content.
- Click Save.
- (Optional) If you are adding this content to a course’s Media Gallery, select Publish, place a checkmark next to the course’s name, and click Save.
- Click Go To Media to view the entry or Go To My Media to be taken back to your My Media repository.

