How to make the Zoom Meeting tool visible in a Canvas Course
1. Navigate to the appropriate Canvas course.
2. In the course navigation, click Settings.
3. Click the Navigation tab.
4. Drag ‘Zoom Meetings’ into the visible items where you would like it to appear.
5. Click Save.
Overview of Zoom Meetings in UNM Canvas
Once you have made the Zoom Meetings tool visible in your course using the steps above, click the link in your course navigation. In the Zoom window, you will see tabs for Upcoming Meetings, Previous Meetings, Personal Meeting Room and Cloud Recordings in addition to the “Schedule a New Meeting” button.
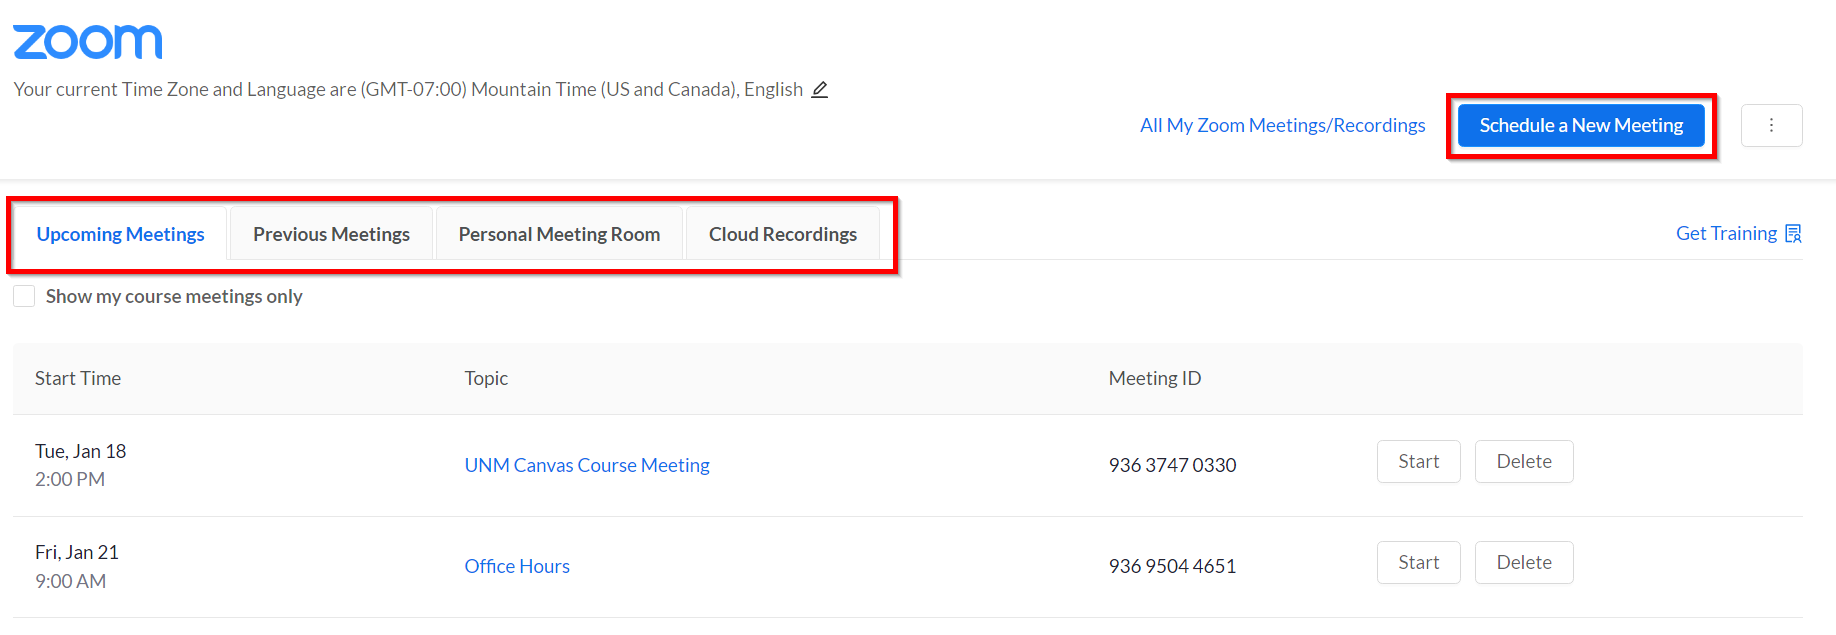
- Upcoming Meetings – lists any one-time or recurring meetings you have scheduled for this course.
- Previous Meetings – lists concluded meetings scheduled for this course.
- Personal Meeting Room – provides access to your Personal Meeting Room settings. We do not recommend sharing your Personal Meeting ID with your students.
- Cloud Recordings – provides access to view and manage cloud recordings in your Zoom account. CAUTION: In compliance with FERPA, recordings that feature interactions with students should not be shared using Zoom’s share feature. For information on securely sharing these types of recordings, please see Zoom Recordings and UNM Canvas.
Relevant Documentation (Instructors):
Zoom - How to Make the Zoom Meeting Tool Visible in a Canvas Course
Zoom - Scheduling Zoom Meetings in UNM Canvas
Zoom - Creating Appointment Times for Students
Zoom - Calendaring
Zoom - Edit or Delete a Zoom meeting
Zoom - Start a Zoom meeting from UNM Canvas
Zoom - Hosting a Zoom Meeting (meeting controls, polling,
breakout and waiting rooms)
Zoom - Recordings and UNM Canvas
Zoom - Manually Upload a recording from your local computer
Zoom - Troubleshooting & FAQ
