Scheduling Zoom Meetings in UNM Canvas
If you have not already done so, make the Zoom Meetings tool visible in your course navigation. Note: this must be done for each course where you wish to use the tool.
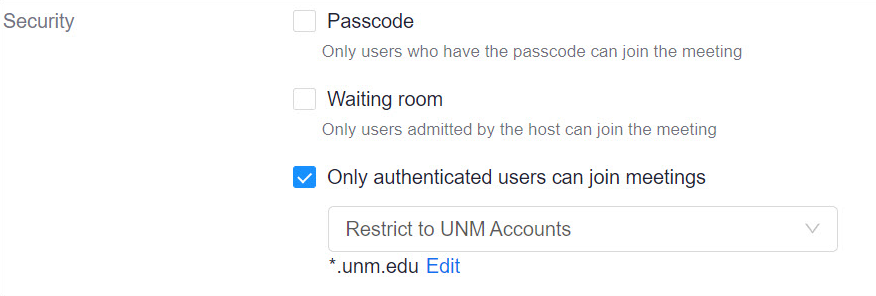
Note - As of November 1st, 2021, UNM Zoom meetings will require at least one security option: "Only authenticated users can join meetings" is the default and recommended. You can choose to create a passcode or enable a waiting room instead, or in addition. Previously scheduled meetings that did not have a security option selected will have a waiting room added.
Your students will only see the sessions you schedule using the Zoom Meeting tool inside UNM Canvas. If you schedule sessions using the UNM Zoom web portal (https://unm.zoom.us/) or desktop app, they will not see those sessions in their list of Upcoming Meetings. However, if you have already scheduled meetings using the Zoom web portal, you can import those meetings to the Zoom Meetings inside UNM Canvas. Please see Troubleshooting & FAQ - "Students not seeing a scheduled meeting."
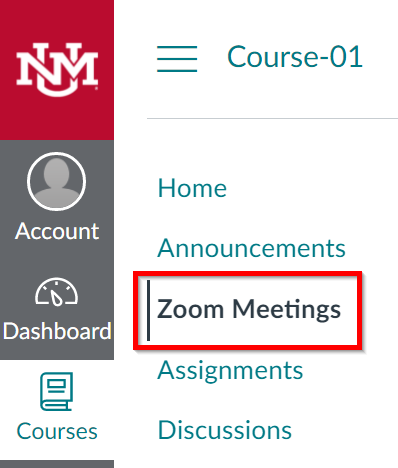
- Click the Zoom Meetings tool from your course navigation.
- The tool should automatically launch with your UNM Zoom account. Note: If you are receiving an error when launching, please refer to Troubleshooting & FAQ for a resolution.
- Click Schedule a New Meeting.

- Select your meeting settings. For more detailed information, see Getting Started > Best Practices...
Topic: the title of your meeting, e.g., your course name or "Office Hours"
When: date and time the meeting will occur
Duration: how long the meeting will last
Recurring meeting: meetings that will be used more than once in the course (e.g., weekly discussion meetings or office hours)
Example for a class that will meet every MWF:
• Recurrence = Weekly
• Repeat every 1 week
• Occurs Mon, Wed, Fri
• End date = last week of class
Security Settings:
To protect UNM Zoom users, as of November 1st, 2021, all Zoom meetings will require at least one security option. The default and recommended setting is "Only authenticated users can join meetings" with "Restrict to UNM Accounts" selected. You can choose to create a passcode or enable a waiting room if you prefer.
• Add a meeting passcode. If you enable this option, meeting attendees will be prompted to enter a passcode after clicking a link to join. Be sure that you let your students know that they will need it and what it is. *Note: Meeting passcodes are not included in Canvas Calendar events unless you
enable one-click join.
• Enable Waiting Room. Enabling this option means that
the meeting host controls who is admitted into the meeting. *Note: we recommend that the host always have the participant window open when the meeting is in session. This will help you be aware of your participants and will also make it easy to notice and admit them from the waiting room. You can also designate someone else to be an alternate host, and ask them be responsible for the waiting room.
Video Host/Participant: select whether you would like your/your participants' video cameras to be automatically turned on or off when joining the meeting.
Meeting Options - Recommendations:
○ Do not “Enable join before host”. This will prevent others from using your meetings in ways you did not intend. Only select this setting when a passcode is set and you would like your students to meet without you.
○ Mute participants upon entry. Students can unmute themselves during the class.
○ Do not “Use Personal Meeting ID”. Think of your personal meeting ID as a standing meeting that never expires. If you use your personal meeting ID for multiple uses, you may end up with conflicts or overlap of participants. Leave this unchecked to generate a unique meeting ID.
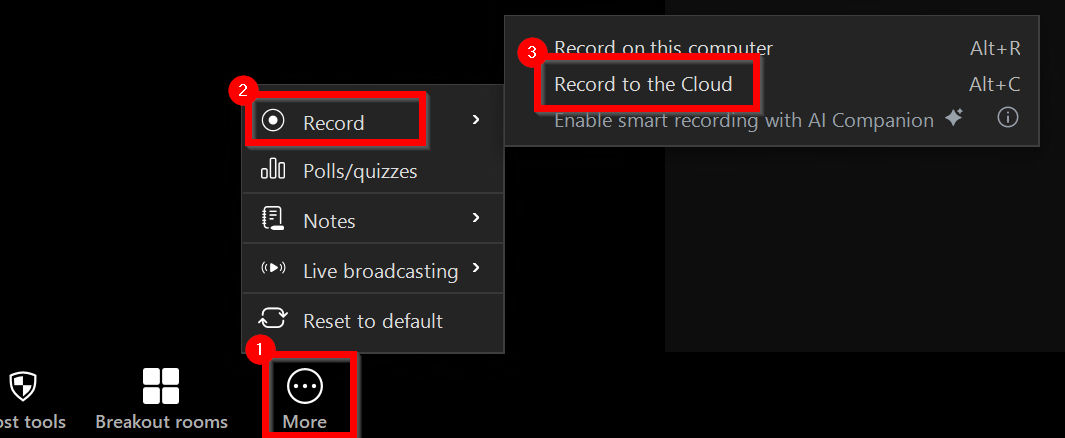
○ Record the meeting automatically – Record to the Cloud:
If you prefer to not record or to only record part of your Zoom Meeting, you can leave this turned off and when desired, use the in-meeting menu instead.
Recordings that feature interactions with students should not be shared using Zoom’s built-in share feature. Shared recordings through Zoom give anyone with the link unauthenticated and unauditable access. For information on securely sharing Zoom recordings, please see
Zoom Recordings and UNM Canvas.
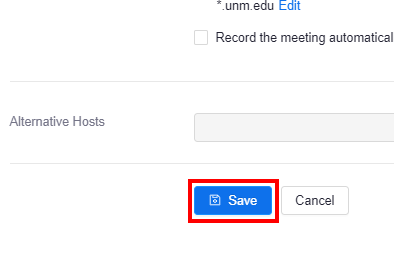
- Add "Alternative Hosts" - Add any Teaching Assistants or Co-Instructors to the “Alternative Hosts” field by entering their UNM email addresses. Alternative Hosts can start the meeting, share hosting capabilities, and manage cloud recordings on your behalf. To enter several at a time, separate them with a comma, e.g., louie_lobo@unm.edu, lucy_lobo@unm.edu, etc.
Note: Be sure anyone you are adding to this field has a Licensed UNM Zoom Account. For more information, see Troubleshooting & FAQ "Alternative Hosts Errors."
- Click Save. Your meeting has been scheduled.
- Scroll back to the top of the Zoom window, and click Course Meetings.
Relevant Documentation (Instructors):
Zoom - How to Make the Zoom Meeting Tool Visible in a Canvas Course
Zoom - Scheduling Zoom Meetings in UNM Canvas
Zoom - Creating Appointment Times for Students
Zoom - Calendaring
Zoom - Edit or Delete a Zoom meeting
Zoom - Start a Zoom meeting from UNM Canvas
Zoom - Hosting a Zoom Meeting (meeting controls, polling,
breakout and waiting rooms)
Zoom - Recordings and UNM Canvas
Zoom - Manually Upload a recording from your local computer
Zoom - Troubleshooting & FAQ